Wire Wrapping: A Comprehensive Guide
Wire wrapping is a technique for making electrical connections without the need for soldering. This method is known for its reliability and effectiveness as an alternative. In the electronics industry, wire wrapping is mainly used for making prototypes and small production batches. This technique is valued because it's reversible and allows changes without soldering that can damage parts. It's useful in telecommunications and data processing hardware, where many short-run circuit boards need assembly.
This article looks at the benefits of wire wrapping compared to traditional soldering, focusing on how easy it is to learn, how quick it is to use, and its flexibility. It also explains the tools and materials required for wire wrapping, outlines the basic steps, points out common mistakes and their causes, and shows how to safely remove wire wraps.
Catalog

Figure 1: Wire Wrapping
Advantages of Wire Wrapping
Minimal Learning Curve
Wire wrapping is easy to learn and use, making it an attractive option for beginners. Unlike soldering, it demands precise temperature control, a steady hand and knowledge of solder chemistry, wire wrapping requires only a few simple tools: a manual or electric wire wrap tool, wire, and a wire stripper. The technique itself is straightforward. First, strip the insulation off the end of the wire. Next, insert the wire into the wrap tool. Then, place the tool over the post and turn it to wrap the wire securely around the post. This simple process can be mastered within a few hours, allowing newcomers to start building circuits almost immediately.

Figure 2: Wire Wrapping
Versatility in Prototyping
Wire wrapping is beneficial for prototypes and small-scale electronics projects where frequent changes and corrections are common. Being able to modify connections quickly without desoldering speeds up development and boosts productivity. This flexibility makes wire wrapping perfect for rapid prototyping and iterative design.
Reduced Risk of Cold or Dry Joints
Wire wrapping minimizes the risk of cold or dry joints that are common issues in soldering. Cold joints occur when solder fails to melt completely, leading to weak, unreliable connections. Dry joints result from improper solder flow, often caused by impurities or incorrect heating and can cause circuit failures. Wire wrapping secures the wire to posts with tight coils, avoiding these solder joint failures and reducing the chance of connection issues.
Absence of Heat and Toxic Fumes During the Process
Wire wrapping eliminates the need for heat or toxic fumes, unlike soldering. Soldering involves a hot iron and produces fumes from flux and solder, potentially containing harmful substances like lead. These conditions pose health risks and necessitate strict safety measures and proper ventilation. In contrast, wire wrapping is a mechanical process performed at room temperature, with no hazardous emissions, making it safer for both the environment and the technician.
Creates Multiple Secure Contacts
Wire wrapping connects by tightly winding a wire around a post, a part of a component or socket where leads are inserted. This winding creates multiple contact points between the wire and the post. Each coil presses firmly against the post because of the wire's tension, improving electrical contact. The multiple contact points make the connection strong and reliable, less likely to be affected by vibrations, temperature changes or other environmental factors that can weaken soldered joints.
Tools and Materials of Wire Wrapping
• Wire Wrap Wire
The core material in wire wrapping is the wire itself. This wire is insulated with a thin layer of polyvinyl chloride (PVC) or Teflon, prevents short circuits between adjacent wires. The core is made of solid copper due to its excellent conductivity and flexibility. The gauge of the wire varies, but 30 AWG (American Wire Gauge) is common because it balances flexibility and strength effectively. The 30 AWG wire is thin enough to wrap around posts or pins in electronic parts but it's still thick enough to stay strong and conductive without easily breaking.

Figure 3: Wire Wrap Wire
• Wire Wrap Tool
A wire wrap tool is a must for wrapping wire around posts. There are two main types: manual and electric.
Manual Wire Wrap Tool: This handheld tool resembles a small screwdriver. It has a socket or hole at the end for the wire. The user places the tool over the post and manually twists it to wrap the wire around the post. Manual tools are more affordable and portable, making them ideal for small projects or field repairs.

Figure 4: Manual Wire Wrap Tool
Electric Wire Wrap Tool: This tool automates the wrapping process, ensuring consistent and tight wraps with less physical effort. It's useful for larger projects or when many connections are required. Electric wire wrap tools boost productivity and reduce fatigue during long wire wrapping jobs.

Figure 5: Electric Wire Wrap Tool
• Wire Unwrap Tool
To correct mistakes or reconfigure circuits, a wire unwrap tool is used. This tool looks similar to the wire wrap tool but is designed to safely remove wire from a post without causing damage. It's good for debugging and modifying wire-wrapped connections during prototyping.

Figure 6: Wire Unwrap Tool
• Wire Strippers
Before wrapping, the wire's insulation must be stripped at the ends to ensure a good electrical connection. Wire strippers remove the insulation without nicking or cutting the copper wire. Precision wire strippers allow for adjustments in strip length and gauge size, ensuring a clean and consistent strip every time.

Figure 7: Wire Stripper
• Posts and Terminal Strips
Posts, or pins, are the points around which the wire is wrapped. These are part of the components being connected, such as integrated circuits or terminal strips. Terminal strips provide a convenient way to connect wires to different components. They are made of conductive materials like copper or brass, coated with tin or gold to enhance conductivity and resist oxidation.

Figure 8: Terminal Strips

Figure 9: Terminal Strip Block
• Inspection Magnifier
Given the small size and precision required in wire wrapping, an inspection magnifier is a helpful tool. It helps inspect the quality of the wraps, ensuring there are no loose connections or overlaps that could lead to short circuits or open circuits.

Figure 10: Inspection Magnifier
Basic Steps for Wire Wrapping
First, collect the tools and materials. The wire wrap tool, a manual tool or an electric wire wrap gun. The wire wrap wire, you may use 30-gauge. The wire wrap posts or pins. And the stripper and cutter, tools for cutting wires to length and removing insulation.
Cut a length of wire that will reach all your intended connection points, plus a little extra. Strip about 1 inch of insulation from each end using the wire stripper. Ensure the exposed wire is clean and straight for a reliable connection.
Choose your starting point, typically a pin or post on your circuit. Insert the stripped end of the wire into the center hole of the wire wrap tool. Position the tool over the post, making sure the wire is perpendicular to it.
Engage the wire wrap tool to tightly coil the wire around the post. The tool should create neat, even wraps, with each coil snug against the previous one, moving up the post. Aim for 7-10 turns to ensure a solid connection.
After the first connection, guide the wire to the next post. Keep the wire taut and smooth as you route it. Repeat the wrapping process at each subsequent connection point.
Once all connections are made, visually inspect each wrap to ensure they are tight and consistent. Loose or overlapping wires can cause unreliable connections. Use a multimeter to test the circuit for continuity and proper function.
Trim any excess wire beyond the wraps to keep the project tidy and prevent short circuits. Use cable ties or clips to manage longer wire stretches between connections.
Types of Wrapping Errors
Pigtails: A pigtail error arises when a wire or fiber twists into a loop or curl, resembling a pig's tail. This twist can occur at one end or along its entire length. Such twisting jeopardizes the cable's structural integrity and disrupts signal transmission.

Figure 11: Pigtail Wrap
An open occurs when there is a break in the continuity of the wrapping. In this case, the wrap fails to fully cover a section of the core material, leaving it exposed. This exposure makes the core susceptible to environmental damage and interference.

Figure 12: Open Wrap and Spiral Wrap
Spiral wrapping errors happen when the wrap is applied in a helical manner with inconsistent pitch or depth. This inconsistency leads to uneven thickness and coverage, creating weak spots along the cable or fabric.

Figure 13: Over Wrap
An over wrap error occurs when the wrapping material overlaps itself too much. This excessive overlap results in increased thickness and reduced flexibility, potentially impairing the functionality of the wrapped product.
Common Causes of Wrapping Errors
Wrapping errors often come from a few common problems: wrong tension, broken equipment, mistakes by the operator and poor material quality. Wrong tension is a common issue. If the tension is too high, the material curls back and forms "pigtails." If it's too low, the wrap is loose and makes "spirals." Equipment problems, like misaligned parts or worn-out components, can also cause issues. For instance, if the feed mechanism is misaligned, it won't apply the wrap evenly, causing gaps or too much overlap. Operator mistakes, usually due to lack of training or inattention during setup and use, also contribute to errors. Finally, the quality of the wrapping material matters a lot. Brittle, stiff, or uneven materials can cause pigtails and gaps because they don't wrap smoothly and may break during the process.
Methodology for Removing Wire Wraps
Wire wraps create secure, solderless connections in electrical and electronic assemblies. Removing these wraps, from delicate or aged circuits, requires meticulous care to avoid damage. Here are the steps to safely remove wire wraps from electronic assemblies.
Step 1: Preparation and Safety
Start by ensuring your workspace is clean, well-lit, and hazard-free. Wear appropriate safety gear like ESD (Electrostatic Discharge) wrist straps and safety glasses to protect both yourself and the sensitive components.
Step 2: Assess the Work Area
Thoroughly inspect the wire-wrapped connections, using a magnifying tool if it is need. This helps identify fragile components or wires under strain, guiding you to handle them more safely.
Step 3: Choose the Right Tool
Select a specialized wire-wrap removal tool that matches the wire gauge and wrap type. These tools unwrap the wire without cutting it, preserving the wire and terminal post integrity. Ensure the tool is in good condition and properly calibrated to avoid slippage or damage.
Step 4: Loosen the Wraps
Gently insert the removal tool tip under the edge of the wrapped wire. Apply slight upward force to lift the wire from the post gradually. Avoid pulling directly on the wire to prevent breakage or post damage.
Step 5: Unwrap the Wire
Rotate the tool around the post in the wrap direction (usually counterclockwise). Continue until the wire loosens enough to be unwrapped manually. Support the wire as it unwinds to avoid snapping back or creating tension on the connected component.
Step 6: Inspect and Clean Up
After unwrapping, inspect the post and wire for wear or damage. Use a small brush or compressed air to clear debris around the work area. Replace any strained or damaged wires or components before reassembling the circuit.
Step 7: Test the Circuit
Test the circuit to ensure it functions correctly after removing all wraps and cleaning the area. Use a multimeter or circuit tester to verify that no other components were compromised during the removal process.
Effective Wire Routing
Wire routing in wire wrapping means planning where each wire will go from one connection point to another. This is important to reduce signal problems and keep the layout neat and tidy. Good routing makes sure wires don't cross over each other too much, helps avoid confusion when fixing issues and lowers the chance of short circuits.
When routing wires, start by connecting the ones that are closest to each other and then work outward. This method helps keep things tidy and reduces the chance of wires crossing over each other. For parallel routing, run the wires side by side with equal spacing whenever possible. This keeps the layout neat and reduces the risk of electromagnetic interference. If wires need to cross, use a consistent layering strategy, such as keeping signal wires above power wires. And using the correct tools can greatly improve how well wires are routed.
Effective wire routing in wire wrapping improves how well the circuit works and makes it easier to fix and change later. By carefully planning the layout, using the right tools, and following good wire management practices, technicians can ensure the circuit connections are reliable and efficient.

Figure 14: Wire Routing
Comparison of Wire Wrapping and Soldering Techniques
|
Feature |
Wire Wrapping |
Soldering |
|
Easy Modifications |
Allows easy changes without damaging
components or boards |
Difficult to modify, removing/replacing
parts can cause damage |
|
Connection Strength |
Produces strong, reliable connections |
Creates strong, durable bonds that
withstand various conditions |
|
Heat Risk |
No heat involved, avoiding risk of
overheating |
Heat required, posing a risk of heat
damage to components/board |
|
Appearance |
Can be bulky and less neat |
Neat and compact, suitable for
mass-produced devices |
|
Production Scale |
Labor-intensive and less practical for
large-scale production |
Easily scalable and automatable for
large-scale production |
|
Skill Requirements |
Requires skill for tight and secure
connections |
Requires practice, precision, and proper equipment |
|
Overall Practicality |
Ideal for prototypes and small runs |
Ideal for large-scale production with
space and uniformity needs |
Conclusion
Wire wrapping is a technique for building electronic circuits that has several benefits. It is easy to learn, flexible for creating prototypes and safe since it doesn't use heat or produce harmful fumes. This method is great for beginners and also useful for experienced users who need a dependable and reversible way to connect parts. Learning about the tools, materials, and steps required for wire wrapping helps technicians improve their work, reduce mistakes and make their projects more reliable. When compared to soldering, wire wrapping is often better for making prototypes and small production runs because it allows for easy changes and doesn't require scaling up. Understanding these differences helps in making better choices for circuit design and assembly, leading to improved performance and flexibility in electronic systems.
Frequently Asked Questions [FAQ]
1. What are the disadvantages of wire wrapping?
First, the process can be time-consuming when dealing with numerous connections or complex circuits. This labor intensity makes it less suitable for large-scale or mass production. Wire wrapping requires specialized tools and skills, which can represent an initial cost and learning curve. The connections, although reliable under normal conditions, might not withstand environments with high vibration or thermal variability, leading to potential loosening over time. Finally, the aesthetic of wire-wrapped connections may be less neat and organized compared to printed circuit boards (PCBs).
2. Does wrapping a wire damage it?
Wrapping a wire itself does not damage the wire if done correctly. Incorrectly using the wire wrapping tool can nick or cut the wire, compromising its integrity. Over-tightening can also stress the wire, leading to breaks or deformities in the wire, near the termination points. Using wire that is too thin or of a wrong material for the specific application can increase the risk of damage during wrapping. While the technique itself is safe for the wire, operator error or material mismatches can introduce issues.
3. What gauge wire is used for wire wrap?
The most used gauge for wire wrapping is 30 AWG (American Wire Gauge). This gauge provides a good balance between flexibility and strength, making it suitable for creating secure and reliable connections without being too bulky or too susceptible to breakage. It's thin enough to be easily manipulated but thick enough to ensure a good connection when wrapped around a post. Other gauges can be used depending on the specific requirements of the project, but 30 AWG is the standard in most wire-wrapping applications.
4. How thick is a wire wrap?
The thickness of a wire wrap depends largely on the gauge of wire used. For the standard 30 AWG wire, the diameter is approximately 0.010 inches (0.255 mm). When wrapped, the wire's thickness can accumulate depending on how many turns are made around the post. Each turn adds to the overall diameter of the wrapped section. For example, several turns could create a wrapped bundle measuring around 0.03 to 0.05 inches in thickness, varying with the tightness and number of wraps.
5. Is it safe to wrap wires?
Wire wrapping is safe when performed correctly and with the appropriate materials. Ensuring that all wire ends are properly insulated and connections are secure minimizes the risk of shorts or disconnections.
About us
ALLELCO LIMITED
Read more
Quick inquiry
Please send an inquiry, we will respond immediately.
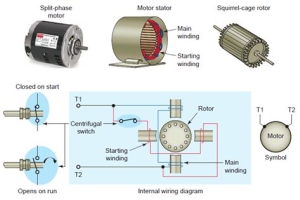
Single-Phase Induction Motors
on August 9th
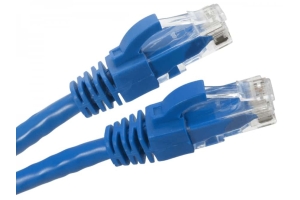
A Complete Guide to Ethernet Cable Types and Functions
on November 12th
Popular Posts
-

Complex Instruction Set Computers: How They Changed Computing?
on April 18th 147749
-

USB-C Pinout and Features
on April 18th 111908
-
Using Xilinx Unified Simulation Primitives: A Comprehensive Guide to FPGA Design and Simulation
on April 18th 111349
-

Power Supply Voltages in Electronics: Meaning of VCC, VDD, VEE, VSS, and GND
on April 18th 83714
-

RJ45 Connector Guide: Pinout, Wiring, Cable Types, and Uses
on January 1th 79502
-

The Ultimate Guide to Wire Color Codes in Modern Electrical Systems
The way our electrical systems use colors isn’t just for looks. Each wire color now indicates a specific function, making it easier to identify and handle electrical components correctly during ins...on January 1th 66869
-

Quality (Q) Factor: Equations and Applications
The quality factor, or 'Q', is important when checking how well inductors and resonators work in electronic systems that use radio frequencies (RF). 'Q' measures how well a circuit minimizes energy...on January 1th 63004
-
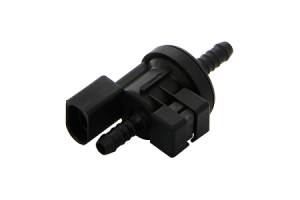
Purge Valve Guide: Function, Symptoms, Testing, and Replacement for Optimal Engine Performance
The purge valve is a key part of a car’s system that helps keep the air clean by managing fuel vapors before they can escape into the atmosphere. This not only helps the environment by reducing pol...on January 1th 62947
-

Achieving Peak Performance with the Maximum Power Transfer Theorem
The Maximum Power Transfer Theorem explains how energy from a source, such as a battery or generator, flows to a connected load. It shows the exact condition where the load receives the most power....on January 1th 54077
-

A23 Battery Specifications and Compatibility
The A23 battery is a small, cylinder-shaped battery with high voltage. Also called 23A, 23AE, or MN21, it runs at 12 volts and much higher than AA or AAA batteries. Its special design make...on January 1th 52089
HOT Part Number
-

BD9B100MUV-E2
Rohm Semiconductor
IC REG BUCK ADJ 1A 16VQFN
UPD70F3539AF5A9-PN7-Q-A
Renesas Electronics America Inc
IC MICROCONTROLLER
18081A621JAT2A
KYOCERA AVX
CAP CER 620PF 100V NP0 1808
FDN340P
onsemi
MOSFET P-CH 20V 2A SUPERSOT3
70231-101
Amphenol ICC (FCI)
CONN RCPT BLADE PWR 8POS EDGE MT
MPSW42RLRAG
onsemi
TRANS NPN 300V 0.5A TO92
MC7824BT
onsemi
IC REG LINEAR 24V 1A TO220AB
AD8009ARZ-REEL
Analog Devices Inc.
IC OPAMP CFA 1 CIRCUIT 8SOIC
LT1815CS5#TRPBF
Analog Devices Inc.
IC OPAMP VFB 1 CIRCUIT TSOT23-5
DG411DYZ
Renesas Electronics America Inc
IC SWITCH SPST-NCX4 35OHM 16SOIC
VFT2060C-M3/4W
Vishay General Semiconductor - Diodes Division
DIODE SCHOTTKY 20A 60V ITO-220AB
TSX562AIYST
STMicroelectronics
IC CMOS 2 CIRCUIT 8MINISO
MR256D08BMA45
Everspin Technologies Inc.
IC RAM 256KBIT PARALLEL 48FBGA
VSC3312YYP-01
Microchip Technology
IC SWITCH 16X16 6.5GBPS 196FCBGA
XC68HC908GP20CFB
Motorola
TSG 8BIT20K FLASH
CSR8811A08-ICXR-R
Qualcomm
IC RF TXRX+MCU BLUETOOTH
MPSW05
onsemi
TRANS NPN 60V 0.5A TO92
1N4055R
Solid State Inc.
DIODE GEN PURP REV 900V 275A DO9 -

ASX342ATSC00XPED0-DP
onsemi
IMAGE SENSOR VGA 1/4 CIS SOC
0433.125NR
Littelfuse Inc.
FUSE BOARD MNT 125MA 125VAC/VDC
1SMA5941BT3G
onsemi
DIODE ZENER 47V 1.5W SMA
DCP010512BP-U/700
Texas Instruments
DC DC CONVERTER 12V 1W
1-1734344-1
TE Connectivity AMP Connectors
CONN D-SUB HD RCPT 15P R/A SLDR
KSD1621STF
onsemi
TRANS NPN 25V 2A SOT89-3
BQ24161RGET
Texas Instruments
IC BATT CHG LI-ION 1CELL 24VQFN
BTA26-600BW
STMicroelectronics
TRIAC ALTERNISTOR 600V 25A TOP3
NCP1239DD65R2G
onsemi
IC OFFLINE SWITCH FLYBACK 7SOIC
TMS320TCI6482BZTZA
Texas Instruments
TMS320 - DIGITAL SIGNAL PROCESSO
BQ20Z90DBTR-V150
Texas Instruments
IC GAS GAUGE LI-ION 30TSSOP
PCMB104T-1R0MT
Susumu
FIXED IND 1UH 18A 3.3 MOHM SMD
CY29942AXCT
Infineon Technologies
IC CLK BUFFER 1:18 200MHZ 32TQFP
CC0402KRX7R9BB561
YAGEO
CAP CER 560PF 50V X7R 0402
STPS20M60SG-TR
STMicroelectronics
DIODE SCHOTTKY 60V 20A D2PAK
AT25010N-10SC-2.7
Microchip Technology
IC EEPROM 1KBIT SPI 3MHZ 8SOIC
04023A1R0CAT4A
KYOCERA AVX
CAP CER 1PF 25V C0G/NP0 0402
ISL6327IRZ
Intersil
SWITCHING CONTROLLER, VOLTAGE-MO -

LQW18AN75NG0ZD
Murata Electronics
FIXED IND
DFA100BA160
SanRex Corporation
DIODE MODULE 1600V 100A
BAR46AFILM
STMicroelectronics
DIODE ARRAY SCHOTTKY 100V SOT23
MAX825SEUK
Analog Devices Inc./Maxim Integrated
IC SUPERVISOR MPU
MMST2222A-7-F
Diodes Incorporated
TRANS NPN 40V 0.6A SOT323
FODM8801AR2
onsemi
OPTOISO 3.75KV TRANS 4-MINI-FLAT
FJV1845FMTF
Fairchild Semiconductor
SMALL SIGNAL BIPOLAR TRANSISTOR,
EVK105RH5R1JW-F
Taiyo Yuden
CAP CER 5.1PF 16V R2H 0402
6651170-3
TE Connectivity AMP Connectors
CONN EDGE DUAL FMALE 4POS 0.508
KSZ8893FQLI-FX
Microchip Technology
IC SWITCH ETH 3PORT 128QFP
170M6340
Eaton - Bussmann Electrical Division
FUSE SQUARE 400A 1.3KVAC RECT
BCM20741A2KFB1G
Broadcom Limited
SINGLE-CHIP BLUETOOTH
MAX3443EASA+
Analog Devices Inc./Maxim Integrated
IC TRANSCEIVER HALF 1/1 8SOIC
GRM0335C1H9R3DA01D
Murata Electronics
CAP CER 9.3PF 50V C0G/NP0 0201
TNY175PN
Power Integrations
11.5 W (85-265 VAC) 15 W (230 VA
742700726
Würth Elektronik
FERRITE CORE 278 OHM SOLID 4MM
DM74S20N
onsemi
IC GATE NAND 2CH 4-INP 14DIP
P4SMA56CA-E3/61
Vishay General Semiconductor - Diodes Division
TVS DIODE 47.8VWM 77VC DO214AC