
How a Blower Motor Resistor Works and Why It Fails?
The blower motor resistor is an important part of your car’s heating and cooling system. It controls how fast the fan blows air through the vents, letting you adjust the airflow to your liking. When it starts to fail, you might notice problems like the fan working at only one speed, not working at all, or no air coming from the vents. Understanding what the blower motor resistor does, how it works, and how to replace it can help you troubleshoot and fix any HVAC issues. This guide explains everything you need to know about blower motor resistors, from identifying symptoms of failure to testing and replacing the part.Catalog

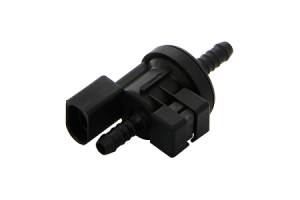
Figure 1. Blower Motor Resistor
What Is a Blower Motor Resistor?
Your car’s heating, ventilation, and air-conditioning (HVAC) system relies on several components working together to regulate the temperature inside the cabin. Some of these parts can last as long as the car itself, while others wear out over time and need to be replaced.
The blower motor resistor is one of these smaller but important electrical components. When it fails, you might notice problems with how air flows through your vents. Since this part directly affects your car’s heating and cooling, understanding how it works can help you recognize when something isn't right. If the resistor stops functioning properly, you may experience issues like the fan getting stuck at one speed or not working at all. Knowing what to look for can save you time and frustration when diagnosing HVAC problems.
How Does a Blower Motor Resistor Work?

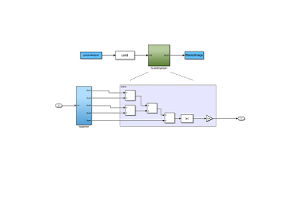
Figure 2. Blower Motor Resistor Function
The blower motor resistor controls how fast the blower fan spins by adjusting the amount of electrical resistance in the circuit. This resistor is connected to the fan switch, which allows you to change the airflow speed inside your car. Depending on the design, this can be done mechanically using a rotating knob or electrically through a digital control system.
In older vehicles, the resistor worked by regulating the power sent to the blower motor. Lower fan speeds meant more resistance, which reduced the voltage reaching the motor. Higher speeds required less resistance, allowing more power to flow and making the fan spin faster. While this method is still used in some cars, most modern vehicles now use a solid-state module instead of a traditional resistor to control the blower motor's speed more efficiently.
The blower motor resistor is usually installed in series with the fan motor and grounded. It comes in different configurations, depending on the number of speed settings available. Each speed setting corresponds to a specific resistor or combination of resistors, which determines the amount of current flowing to the motor.
When the highest fan speed is selected, the resistor is bypassed, and the blower motor receives full power. This allows the fan to run at maximum speed. In lower settings, the resistor reduces the voltage, slowing the fan down. If the resistor fails, it can cause the blower motor to work only at certain speeds or stop functioning altogether.
Where Is the Blower Motor Resistor Located?

Figure 3. Blower Motor Resistor Placement
The blower motor resistor is typically found underneath the blower motor itself. In most vehicles, this area is located behind the dashboard on the passenger side. Accessing the resistor can sometimes be straightforward, but in some cases, you may need to remove the glove box or other interior panels to reach it.
Its placement is designed to keep it close to the blower motor for effective operation, but this location can make it slightly challenging to access during repairs. Always check your vehicle’s manual for specific instructions, as the exact location and access process can vary depending on the make and model of your car.
Signs of a Failing Blower Motor Resistor
When a blower motor resistor starts to fail, it can disrupt the performance of your car’s heating and cooling system. Recognizing the symptoms early can save you from bigger HVAC problems down the road. Here are the main signs to look out for:
Blower Fan Stuck at One Speed
One of the most common signs of a failing blower motor resistor is when the fan only works at one speed, regardless of the setting you choose. This happens because the resistor controls how much electrical current flows to the fan motor, adjusting its speed. If the resistor is damaged or shorted, it might only allow the fan to operate at one specific speed.
Even though your air conditioning or heating system may still function, it won’t provide the flexibility you need. Replacing the faulty resistor can restore full control over the fan speed.
Blower Fan Not Working at All
Another symptom is when the blower fan doesn’t work on certain settings—or not at all. If some fan speeds are unavailable, or the fan stops functioning completely, it’s often due to a damaged resistor.
This issue can sometimes be mistaken for a problem with the blower motor switch, so it’s a good idea to have the system checked by a professional to confirm the cause.
No Airflow from Vents
If no air comes out of the vents, even when the fan is turned on, it could point to a problem with the blower motor resistor. This part controls the power supply to the blower motor. If the resistor fails completely, it may cut off power to the motor, stopping it from creating airflow.
When airflow is completely blocked, your car’s air-conditioning and heating systems become useless. This issue needs immediate attention, as it not only affects comfort but could also signal further electrical problems in the HVAC system.
If you notice any of these issues, it’s a good idea to have your car inspected by a technician. Catching the problem early can help you avoid more expensive repairs later on.
How to Test a Blower Motor Resistor?
Testing a blower motor resistor is an important step in diagnosing HVAC problems in your car. Follow these steps to check if the resistor is functioning correctly:
Locate the Blower Motor Resistor Fuse
The first step is to find the fuse for the blower motor resistor. Check your car’s manual to identify its exact location. It is usually found in the fuse box, which may be under the dashboard, in the engine bay, or another accessible spot in your vehicle.
Test the Resistor Fuse
Once you’ve located the fuse, use a 12-volt test light to check if it’s working. Connect one end of the test light to the ground and touch the other end to the fuse terminals.
Observe whether power flows to both terminals. If the light turns on for both sides, the fuse is fine. However, if there’s no power or only one side lights up, the fuse has likely burned out and needs replacement.
Remove and Test the Blower Motor Resistor

Figure 4. Testing Blower Motor Resistor
Next, disconnect the power source from the blower motor. Attach the 12-volt test light to the resistor and repeat the test. Doing this eliminates errors caused by the car’s electronic temperature control system, allowing you to focus solely on the resistor.
Change the fan speed settings to check if the problem occurs at a specific speed. If the blower motor loses power at higher speeds, the resistor might be faulty. Conversely, if the motor works at high speeds but not at lower ones, the resistor is likely the issue.
Check the Blower Motor Switch
In some cases, the blower motor switch might also contribute to the problem. At higher fan speeds, the switch sends power directly to the blower motor. If there’s no power at high speeds, the issue could stem from a defective switch rather than the resistor.
Testing your blower motor resistor using these steps will help you determine if it needs to be replaced or if the issue lies elsewhere in the system. If you’re unsure of the results, consider consulting a professional to confirm the diagnosis.
How to Replace a Blower Motor Resistor?
Replacing a blower motor resistor may sound challenging, but it’s a straightforward process if you follow these steps:
Locate the Blower Motor Resistor
Start by finding the resistor. It is usually located close to the blower motor, which can be found under the dashboard on the passenger side or, in some vehicles, in the engine bay. Refer to your vehicle’s manual to pinpoint its exact location.
Remove the Blower Motor Resistor
Once located, carefully remove the blower motor resistor. First, detach any components covering the resistor, such as the housing or ductwork. This might include the pigtail connector that links to the air conditioner system.
Next, remove the screws securing the resistor using a ratchet with a small extension if needed. Once the screws are out, you can pull the resistor free.
Disconnect the Wires
After removing the resistor, disconnect the attached wires. Use wire cutters or a stripping tool to carefully detach them. Make sure to note the wire connections to avoid confusion during reassembly.
Install the New Blower Resistor
Before installing the new resistor, apply a layer of dielectric grease around its housing. This helps protect the resistor from moisture, which is especially important if you drive in wet or off-road conditions.
Secure the new resistor in its original position and fasten it with screws. Reconnect the wires, ensuring they match the original connections. If the pigtail connector is damaged, you’ll need to replace it by cutting and reconnecting the wires. This is usually straightforward as the wires are color-coded for easy identification.
Once everything is connected, reattach the housing and any other components you removed. Test the system to confirm that the new blower motor resistor is working properly.
Replacing the resistor restores your car’s HVAC system to full functionality, giving you control over fan speed and airflow once again.
Conclusion
The blower motor resistor plays an important role in controlling your car’s fan speed. When it fails, you may notice issues like the fan getting stuck at one speed, not working at all, or no airflow from the vents. Testing and replacing a faulty resistor is a simple process that can restore your heating and cooling system. If you experience any of these problems, checking the blower motor resistor can help you get your HVAC system working properly again.
About us
ALLELCO LIMITED
Read more
Quick inquiry
Please send an inquiry, we will respond immediately.
Frequently Asked Questions [FAQ]
1. Why do blower motor resistors fail?
Blower motor resistors usually fail due to overheating or corrosion. If the blower motor has too much friction while spinning, it can create excess electrical current, which can overheat and damage the resistor.
2. What does a blower motor resistor do?
A blower motor resistor controls the speed of the fan in your car’s heating and cooling system. It adjusts how much power reaches the blower motor, allowing you to change the airflow speed.
3. Can you still drive if the blower motor stops working?
Yes, but it can make driving uncomfortable, especially in extreme temperatures. If the blower motor isn’t working, your defroster may also stop working, which can make it harder to clear fog or ice from the windshield.
4. How long does a blower motor resistor last?
A blower motor resistor typically lasts between 5 to 10 years, depending on the vehicle’s usage, climate conditions, and electrical system health. Regular HVAC maintenance can help extend its lifespan.
5. Can a bad blower motor resistor drain the battery?
Yes, if the resistor short-circuits, it may cause a continuous power draw, even when the car is off. This can lead to a parasitic drain, which could eventually discharge the battery.

Everything You Need to Know About Mass Air Flow MAF Sensors
on January 29th

LFE3-35EA-7FTN256C FPGA: Specifications, Features, and Advantages
on January 29th
Popular Posts
-

Complex Instruction Set Computers: How They Changed Computing?
on June 4th 148298
-

USB-C Pinout and Features
on June 4th 129904
-
Using Xilinx Unified Simulation Primitives: A Comprehensive Guide to FPGA Design and Simulation
on June 4th 111778
-

Power Supply Voltages in Electronics: Meaning of VCC, VDD, VEE, VSS, and GND
on June 4th 93324
-

RJ45 Connector Guide: Pinout, Wiring, Cable Types, and Uses
on January 1th 92002
-

The Ultimate Guide to Wire Color Codes in Modern Electrical Systems
The way our electrical systems use colors isn’t just for looks. Each wire color now indicates a specific function, making it easier to identify and handle electrical components correctly during ins...on January 1th 76116
-

Quality (Q) Factor: Equations and Applications
The quality factor, or 'Q', is important when checking how well inductors and resonators work in electronic systems that use radio frequencies (RF). 'Q' measures how well a circuit minimizes energy...on January 1th 74018
-
Purge Valve Guide: Function, Symptoms, Testing, and Replacement for Optimal Engine Performance
The purge valve is a key part of a car’s system that helps keep the air clean by managing fuel vapors before they can escape into the atmosphere. This not only helps the environment by reducing pol...on January 1th 68021
-

Understanding Capacitors and Their Symbols in Circuit Diagrams
Capacitors are small parts used in almost all electronic devices. They store and release electrical energy and are found in things like power supplies, radios, and circuits that help reduce noise. ...on June 4th 57890
-

A23 Battery Specifications and Compatibility
The A23 battery is a small, cylinder-shaped battery with high voltage. Also called 23A, 23AE, or MN21, it runs at 12 volts and much higher than AA or AAA batteries. Its special design make...on January 1th 57471
HOT Part Number
-

TS2937CP50
Taiwan Semiconductor Corporation
0.5A 5V ULTRA LOW DROPOUT VOLTAG
RC0603FR-072R4L
YAGEO
RES 2.4 OHM 1% 1/10W 0603
NOJB686M006RWJ
KYOCERA AVX
CAP NIOB OXID 68UF 20% 6.3V 1210
MC74HC03ANG
onsemi
IC GATE NAND OD 4CH 2-INP 14DIP
6-1761615-5
TE Connectivity AMP Connectors
CONN DIFF ARRAY RCPT 200POS SMD
2EZ15D5
Microsemi Corporation
DIODE ZENER 15V 2W DO204AL
MMSZ5247BT1G
onsemi
DIODE ZENER 17V 500MW SOD123
AN1431M-E1
Panasonic Electronic Components
IC VREF SHUNT ADJ 2% 3HSIP
1N4595
Powerex Inc.
DIODE GP 1.2KV 150A DO205AA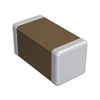
GRM1886S1H750JZ01D
Murata Electronics
CAP CER 75PF 50V S2H 0603
A5358CA
Allegro MicroSystems
IC SMOKE DETECTOR PHOTO 16DIP
GRT31CR61E106ME01L
Murata Electronics
CAP CER 10UF 25V X5R 1206
35YXA470MEFC10X16
Rubycon
CAP ALUM 470UF 20% 35V RADIAL
NC7ST04P5
Fairchild Semiconductor
INVERTER, HST/T SERIES, 1 FUNC,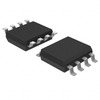
NJM2246M
Nisshinbo Micro Devices Inc.
IC VIDEO SW 3IN/1OUT 8DMP
M37477E8SP
Renesas Electronics America Inc
8-BIT, OTPROM, 8MHZ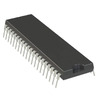
ATMEGA164A-PU
Microchip Technology
IC MCU 8BIT 16KB FLASH 40DIP
3362X-1-501LF
Bourns Inc.
TRIMMER 500 OHM 0.5W PC PIN SIDE -

PE-52626
Pulse Electronics
FIXED IND 220UH 1.5A 420 MOHM TH
NCP15XW152J03RC
Murata Electronics
THERM NTC 1.5KOHM 3950K 0402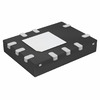
FAN501MPX
Fairchild Semiconductor
IC OFFLINE SWITCH FLYBACK 10MLP
PIC32MX230F064D-I/PT
Microchip Technology
IC MCU 32BIT 64KB FLASH 44TQFP
DS1775R+T&R
Analog Devices Inc./Maxim Integrated
SENSOR DIGITAL -55C-125C SOT23-5
TZM5232B-GS18
Vishay General Semiconductor - Diodes Division
DIODE ZENER 5.6V 500MW SOD80
CL10A475KL8NRNC
Samsung Electro-Mechanics
CAP CER 4.7UF 35V X5R 0603
BFC237321685
Vishay Beyschlag/Draloric/BC Components
CAP FILM 6.8UF 10% 100VDC RADIAL
SE5532AD8R2G
onsemi
IC OPAMP GP 2 CIRCUIT 8SOIC
54LS21DMQB
Texas Instruments
AND GATE, LS SERIES
CS51414ED8
onsemi
IC REG BUCK ADJ 1.5A 8SOIC
5SGXMA5N2F40C2N
Intel
IC FPGA 600 I/O 1517FBGA
DAC8841FS
Analog Devices Inc.
IC DAC 8BIT V-OUT 24SOIC
PVD3354NS
Infineon Technologies
SSR RELAY SPST-NO 240MA 0-300V
EMK212BJ475KG-T
Taiyo Yuden
CAP CER 4.7UF 16V X5R 0805
MC14099BFL1
onsemi
D LATCH, LOW LEVEL TRIGGERED,
IS82C55AZ96
Renesas Electronics America Inc
IC XPNDR PARALLEL 44PLCC
ADM809-5LARTZ-RL7
Analog Devices Inc.
IC SUPERVISOR MPU 4.63V SOT23 -
GRM2166T1H301JD15D
Murata Electronics
CAP CER 300PF 50V T2H 0805
FAN3850AUC19X
onsemi
IC AMP CLASS AB MONO 6WLCSP
XC2V3000-5BF957C
AMD
IC FPGA 684 I/O 957FCBGA
STMAV335TTR
STMicroelectronics
IC VIDEO SWITCH SP3T 16TSSOP
A451PM
Powerex Inc.
DIODE GP 1.6KV 2500A DO200AC
FQD12P10TM
Fairchild Semiconductor
MOSFET P-CH 100V 9.4A TO252
CL10C150JB8NFNC
Samsung Electro-Mechanics
CAP CER 15PF 50V C0G/NP0 0603
ADT7320UCPZ-R2
Analog Devices Inc.
SENSOR DGTL -40C-150C 16LFCSP
SMAJ30CA
SMC Diode Solutions
TVS DIODE 30VWM 48.4VC SMA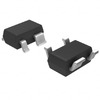
NCP552SQ33T1
onsemi
IC REG LINEAR 3.3V 80MA SC82AB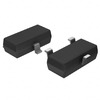
MAX6326UR29+T
Analog Devices Inc./Maxim Integrated
IC SUPERVISOR 1 CHANNEL SOT23-3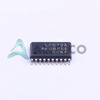
SN74LVC573APWR
Texas Instruments
IC OCTAL TRANSPAR LATCH 20-TSSOP
CPF0603B360RE1
TE Connectivity Passive Product
RES SMD 360 OHM 0.1% 1/16W 0603
AD623AR-REEL
Analog Devices Inc.
IC INST AMP 1 CIRCUIT 8SOIC
LM385BD-2-5
Texas Instruments
IC VREF SHUNT 1.5% 8SOIC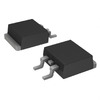
SPX29150T-L-5-0/TR
Diodes Incorporated
IC REG LINEAR 5V 1.5A TO263AB
XC7VX980T-L2FFG1930E
AMD
IC FPGA 900 I/O 1930FCBGA
CC0603ZRY5V9BB153
YAGEO
CAP CER 0.015UF 50V Y5V 0603